Introduction
This is the third part of my LEMP virtual server setup. This portion involves installing the NginX web server, MySQL database, and PHP software.
Installation
Luckily all of the software we want is in the Canonical Ubuntu repository. For the most part, I'm going to follow this HowtoForge article.
sudo apt-get install nginx
sudo apt-get install php5-fpm
sudo apt-get install mysql-server mysql-client
This gets you the basic setup, but there are a few other PHP5 software packages I want. In order to filter the available packages, you can use this command:
apt-cache search php5
These are the packages I want:
- php5-curl: Allows me to use cURL to transfer files in PHP.
- php5-mysql: This is the package for interfacing PHP with a MySQL database.
- php5-mcrypt: PHP module for mcrypt encryption and one-way hashing. A must for securing data.
- php5-xcache: Speeds up PHP scripts.
sudo apt-get install php5-curl php5-mysql php5-mcrypt php5-xcache
Configuring the software
NginX Web Server
The configuration files for NginX are found in /etc/nginx/. The main file is nginx.conf.
There are a few things I want to do in this file:
- Ensure the number of worker processes is equal to the number of available cores. Anymore is a waste of memory resources, any less and I might not be able to fully utilize my CPU. This is controlled by the worker_processes variable.
worker_processes 4;
- Turn on GZip. This will compress data before sending them to the client. Unfortunately, not all web clients support gzip. Notably, Internet Explorer 6 doesn't.
I also want the ability to send pre-compressed content. This means I can save the compressed file on my disk and I don't have to use CPU resources to compile data before sending it to the client. I'm not entirely sure how various GZip compression levels compare to each other, only that 1 is the least compression and 9 is the most compression.
You'll have to do your own testing to determine what works best for your setup. Here's a link to the Gzip Module documentation. I've posted my gzip settings below.
gzip on;
gzip_static on;
gzip_vary on;
gzip_disable "msie6";
gzip_types text/plain text/css application/json application/x-javascript text/xml application/xml application/xml+rss text/javascript;
gzip_comp_level 6;
gzip_http_version 1.1;
- I added my own link to a separate configuration file. I also removed the link to the default configurations. For convenience I decided to place the site-specific configuration in my home folder.
# my site
include /home/helloworld922/www/conf/*;
# get rid of the default configurations
#include /etc/nginx/sites-enabled/*;
I patterned my site-specific configuration based off of the default configurations.
server {
 listen   80; ## listen for ipv4; this line is default and implied
 listen   [::]:80 default ipv6only=on; ## listen for ipv6

 root "/home/helloworld922/www/public";
 index index.html index.htm index.php;

 # Make site accessible from http://localhost/
 server_name localhost;

 location / {
  # First attempt to serve request as file, then
  # as directory, then fall back to index.html
  try_files $uri $uri/ /index.html;
  # Uncomment to enable naxsi on this location
  # include /etc/nginx/naxsi.rules
 }

 # cache items
 location ~* \.(jpg|jpeg|png|gif|js|css)$ {
  expires 30d;
 }

 location /doc/ {
  alias /usr/share/doc/;
  autoindex on;
  allow 127.0.0.1;
  deny all;
 }

 # Only for nginx-naxsi : process denied requests
 #location /RequestDenied {
  # For example, return an error code
  #return 418;
 #}

 #error_page 404 /404.html;

 # redirect server error pages to the static page /50x.html
 #
 #error_page 500 502 503 504 /50x.html;
 #location = /50x.html {
 # root /usr/share/nginx/www;
 #}

 # pass the PHP scripts to FastCGI server listening on 127.0.0.1:9000
 #
 location ~ \.php$ {
  try_files $uri =404;
  fastcgi_pass 127.0.0.1:9000;
  fastcgi_index index.php;
  include fastcgi_params;
 }

 # deny access to .htaccess files, if Apache's document root
 # concurs with nginx's one
 #
 location ~ /\.ht {
  deny all;
 }
}
I intend to in the future provide a custom page for errors such as server errors (50x) or 404 errors. We must then reload the NginX service in order to update the configurations.
sudo service nginx reload
Note: It's really easy to configure an NginX server wrong. The NginX wiki specifically warns against following most online tutorials blindly. My configurations are no exception! You are welcome to refer to my configs and I really hope I did a proper job here, but I am fairly new to the NginX web server myself. The NginX wiki has a great article on Common Pitfalls with NginX configurations. There are also more configuration resources here.
PHP
The PHP configurations are found in \etc\php5\. The main files I'm interested in are \etc\php5\cli\php.ini and \etc\php5\fpm\php.ini. The first file is used when you call PHP from the command-line or packages which don't use PHP-FPM. PHP-FPM is a FastCGI module used by NginX. I won't go too much into the differences, from my understanding there really aren't too many differences between the two that a PHP developer has to deal with directly. I won't go through all the changes I made (I didn't make that many at all), the only change I want to highlight is specific to a developer server.
display_errors = On
For a developer this allows you to examine PHP script errors by outputing the error to the page. You should have this off for a production environment.
Once you have your settings set how you want, make sure to restart the PHP5-FPM service.
sudo service php5-fpm restart
MySQL Database
The main changes I made to MySQL is create a user which can managed from my host machine. This is done using the MySQL configuration file \etc\mysql\my.cnf as well as using the MySQL commandline client (since the server setup doesn't have a GUI).
The change I want to make to \etc\mysql\my.cnf is allow other computers connect to this database. This is done by commenting out/removing the bind-address configuration which is configured to localhost by default.
#bind-address = 127.0.0.1
The next step is to start the mysql client. This command will start mysql using the root user and you will be prompted for a password (you did set a password when you installed mysql, right?).
mysql -uroot -p
What I did was I created the user root@10.0.0.1. This is the static IP for my host machine. I also granted all the permissions for this user.
create user 'root'@'10.0.0.1' identified by 'your_password_goes_here';
grant all privileges on *.* to 'root'@'10.0.0.1' with grant option;
flush privileges;
This creates a user named root on host 10.0.0.1 with the password your_password_goes_here. You'll definitely want to make sure you have the right password here! The second line grants all privileges to the user we just created.
If you want to check what users are available, you can use this:
select user,host from mysql.user;
From this point on I'm able to do all my MySQL management from my host machine. I'm using the MySQL Workbench to manage my MySQL database.
Headless Virtual Machine
Rather than have the Virtual Box Manager and virtual machine windows open all the time it's much nicer to run a "headless" server. To do this, run the following command:
VBoxManager.exe startvm "Server Name" --type headless
Where Server Name is the Virtual Box name, NOT the actual virtual machine's name. You may need to provide the path to the Virtual Box executable as well.
Conclusions
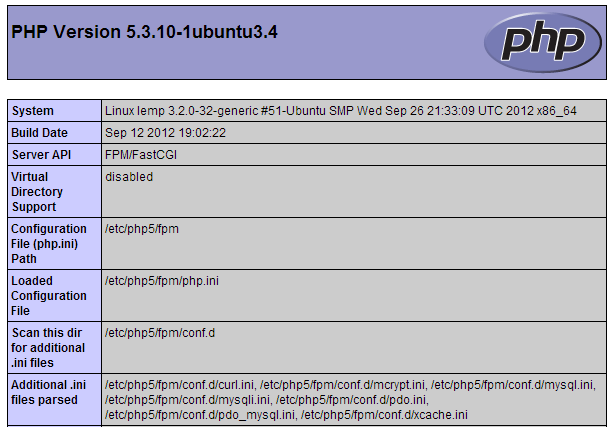
Last bit is to test and make sure our setup worked successfully. The simplest way is to create a test page which will display the PHP info screen.
<?php
phpinfo();
?>
I put this test file in the base directory in index.php. Open up a web browser, then navigate to 10.0.0.2/index.php. Your address may vary. If everything works out, you'll get a page which looks something like this:
There may be cases where you'll want to manually check for software updates. Luckily with Ubuntu this is easy to do.
sudo apt-get update
sudo apt-get upgrade
That's all for now, we now have an isolated virtual server which we can easily manage from our host machine! Feel free to leave comments/questions about my setup.
No comments :
Post a Comment