Introduction
I recently found a plugin for Eclipse which allows me to create NSIS installers for Windows. It's called EclipseNSIS, and so far I've found it quite useful.
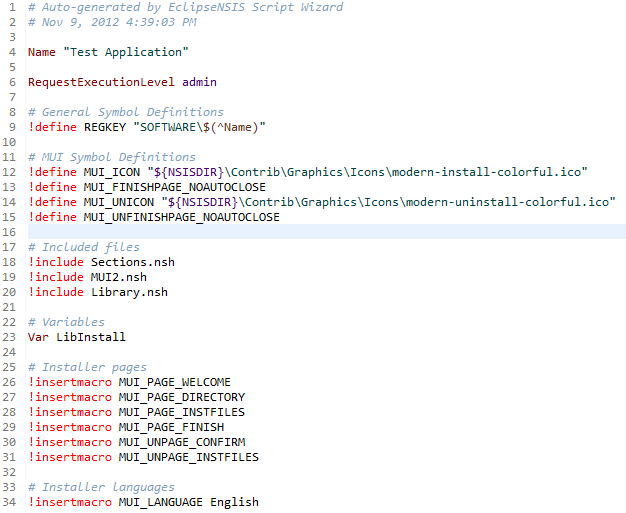
To test it out I created a simple installer which would install a registered COM DLL file.
Installation
Before installing the Eclipse plugin, you need to install NSIS. The setup is fairly straight forward so I won't go into the details. I just chose the defaults and got everything installed.
The next step is to start up Eclipse. The plugin requires Eclipse 3.5 or better. You can get the latest version of Eclipse here.
The easiest way to install NSIS is to use Eclipse's internal software management system. The package url is http://eclipsensis.sf.net/update.
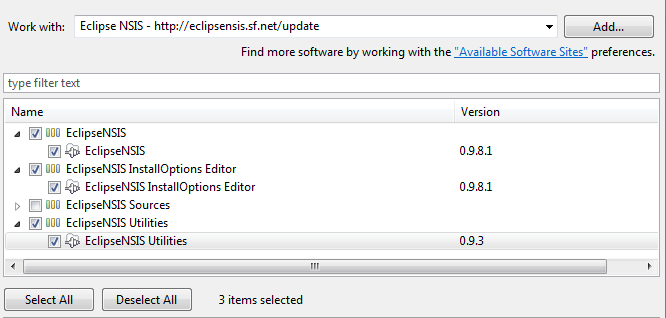
I just followed the default install options, restart Eclipse, and you're good to go.
First Impressions
So the first thing I've noticed about the plugin is the lack of perspective view. That's not a big deal as it's possible to create your own perspective. Also, since this is an installer, you'll likely be dealing with a wide variety of different project so I suppose you don't really need an installer. The plugin detects if you have an NSIS script open and will open up the appropriate editor and toolbars regardless of what perspective you're in. Doesn't quite stick with the way Eclipse usually works, but still quite functional.
So first things first, let's create a new installer script.
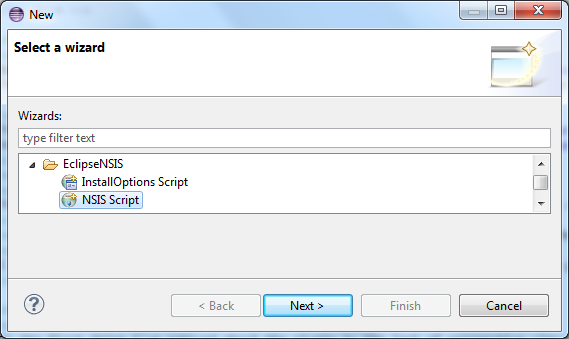
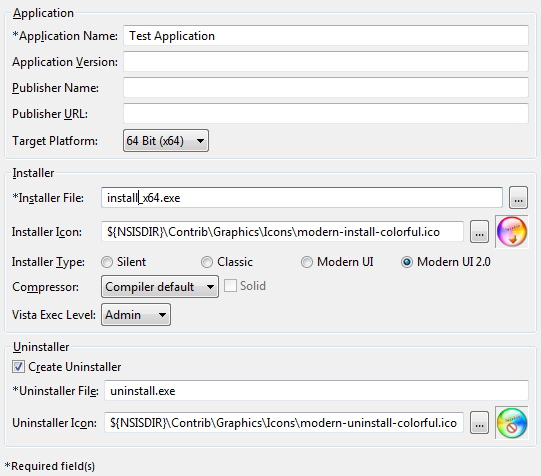
The available settings you can choose through the script wizard is quite impressive. You can customize pretty much every aspect of the NSIS script, which is quite nice. You can pretty much create a full installation script through the GUI. However, once you've created the script you're stuck modifying the scripts by hand.
The editor does have auto-complete and syntax highlighting, though. These are in my opinion the two best features of any editor/development environment.
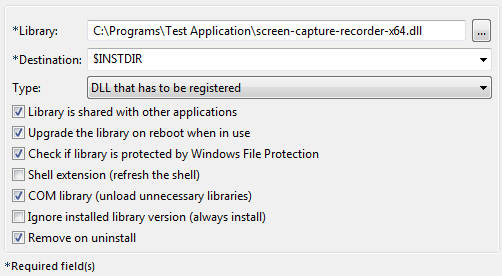
I haven't used it a whole lot, but I have found one issue already. The issue is trying to register a 64-bit DLL. Unfortunately the setup script doesn't generate the correct script code. It's missing a line which declares that it is registering a x64 library.
You'll have to modify both the installer and uninstaller.
Installer portion
File screen-capture-recorder-x64.dll
!define LIBRARY_COM
# Need to add this line to make sure the macro registers a 64-bit library
!define LIBRARY_X64
!insertmacro InstallLib REGDLL $LibInstall REBOOT_PROTECTED screen-capture-recorder-x64.dll $INSTDIR\screen-capture-recorder-x64.dll $INSTDIR
# Here's the corresponding undef
!undef LIBRARY_X64
!undef LIBRARY_COM
Uninstaller portion
!define LIBRARY_COM
# Need to add this line to make sure the macro unregisters a 64-bit library
!define LIBRARY_X64
Delete $INSTDIR\screen-capture-recorder-x64.dll
!insertmacro UnInstallLib REGDLL SHARED REBOOT_PROTECTED $INSTDIR\screen-capture-recorder-x64.dll
# Here's the corresponding undef
!undef LIBRARY_X64
!undef LIBRARY_COM
Final Thoughts
When I checked the project's SourceForge page I realized that the project has not been updated since November 12, 2011. I'm not sure if this project is still active or not, but it is definitely usable. There may be a few bugs with the script wizard, but that's ok because I view the primary benefits of this plugin being the Syntax Highlighting and auto-complete.
The main NSIS project itself hasn't had any significant activity since December of 2009, but it is still widely used, particularly among open source projects.
For the future I'm going to see if I can integrate EclipseNSIS with the Unicode NSIS project.
For those interested in what DLL I'm working with, it's part of the Screen Capture Recorder to Video for Windows (Free) project.
No comments :
Post a Comment