Introduction
Recently I was in the process of setting up a LEMP virtual server. The idea was to have a private web server that I could play around and test with. Since I didn't have a spare computer to host my server, I decided to go with a virtual server. A LEMP server consists of:
- Linux Operating System
- NginX Web Server
- MySQL Database
- PHP5 dynamic webpage scripting
For those familiar with the more common LAMP server, the LEMP server is a slight modification. It uses the NginX Web Server instead of the Apache Web Server. There are a few key benefits of using NginX over Apache. The primary claimed benefit is that NginX scales better to large server loads. I haven't verified this claim myself yet, but there are various benchmarks online which seem to back this claim. The great thing about the setup I have is I could easily setup a LAMP server as well and compare the two.
In this part I'm going to go over the various setup required on the host machine and Virtual Box settings, as well as installing the Ubuntu operating system.
Here's a few of the details for the virtual server I'm setting up:
- Virtual Box for the virtual machine software.
- Ubuntu 12.04 LTS 64-bit Server OS. Note that at the time of this writing the latest version of Ubuntu is 12.10. I'm not entirely sure what the technical differences between the two are. Ubuntu 12.10 is advertised to have the latest technology, but it isn't a LTS (Long Time Support) version of Ubuntu, which Ubuntu 12.04 is. The LTS versions are supported for 5.5 years vs. the 2.5 years for non-LTS versions. This isn't a major factor for a private test server, but may be a deal breaker for production-quality/public servers.
- Putty Telnet/SSH client for Windows. Note that for people using a Linux OS or any OS with good SSH support via the terminal you won't need a separate client.
- MySQL Workbench for managing the MySQL database on my host machine.
Creating the Virtual Machine
There are a few primary reasons I wanted to setup a virtual server:
- I don't have a second computer to dedicate for a server (as mentioned above). I can host pretty much as many servers as I want to on my one computer, allowing me to test network systems without needing lots of hardware.
- I can run servers with multiple operating systems. For example, my primary computer runs Windows 7 Home Premium. However, what I really want is a server running an enterprise or server OS.
- I can easily isolate my servers both from each other as well as from the outside world. This is a great feature if you're thinking of paying for a hosted web server. Virtual servers are basically one step down from having a dedicated server while still being much cheaper.
I'm using Virtual Box to run Virtual Machines. First things first, go ahead and create a new virtual machine. Note that the name you choose for your Virtual Machine here is only used by Virtual Box to keep track of different virtual machines. The machine's name is chosen when you install the OS. The next step is to choose the maximum amount of memory you want the virtual machine to use.
I chose a fairly large maximum memory usage for my VM (4GB out of my 8GB system memory), for a Ubuntu Server the minimum requirement is 128 MiB.
I created an 8GB dynamically allocated hard disk using the default VDI format. I'm not too concerned about the drive allocation, the main important parameter is the size. For those concerned about the intricate details, I've provided a few links:
There are various performance options you can pick and tune, for the most part I tried to tune my system for the maximum performance. I won't highlight these but feel free to play around with the various performance options.
Network Settings
The main area that I tweaked was the network settings. These were the main design goals I had for my network settings:
- Ability to modify "critical" components only from the host. This includes packages like Samba, SSH, MySQL, etc.
- The client VM must be able to connect to the Internet and the local area network (LAN).
- The network settings should not conflict with any other IP addresses which may be assigned by a DHCP server.
I have 2 network adapters setup for each virtual machine. The first network is my primary network. This is the network which can interface with the rest of my local area network, as well as with the internet. If you don't want your virtual machine to be able to interface with your local area network, you can try the NAT network type. This is basically a direct connection between the virtual machine and the internet. It's completely hidden from your local area network, and can't be seen by your host machine. However, there have been some comments that the NAT interface is slower than a bridged network. I left promiscuous mode disabled. Here's an article describing the various network settings for Virtual Box. I also changed to a server-class network adapter type.
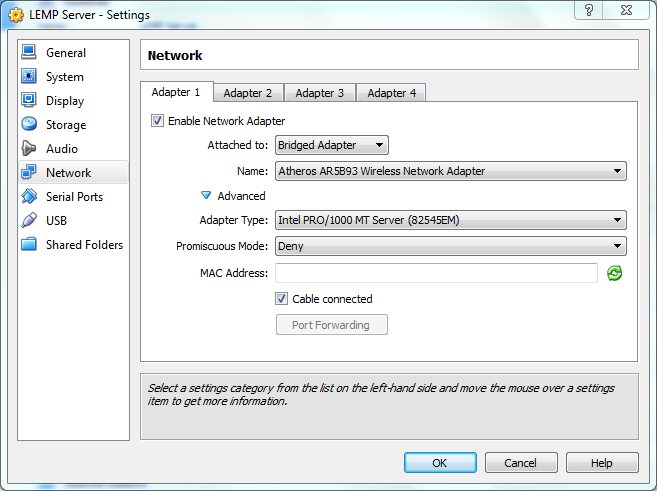
The second network is a host-only network. However, I have experienced issues setting this up before installing the Ubuntu Server, so we'll set this up later.
Ubuntu Installation
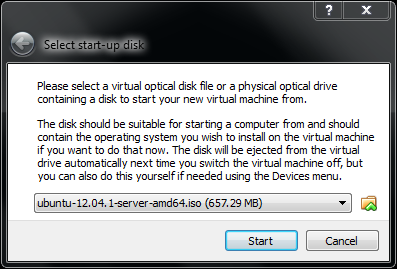
If you haven't done so already, download the Ubuntu Server ISO image. Start up the server for the first time. If you're greated with a prompt asking you to select a startup disk, find the location of the ISO image file and click start. You may also use a physical disk by selecting the appropriate disk drive.
Installation settings
If you're having problems getting the Ubuntu installation started, refer to the Troubleshooting section. Otherwise, continue with this section. For the most part I'm sticking with the default settings. I'll highlight a few of the main critical steps.
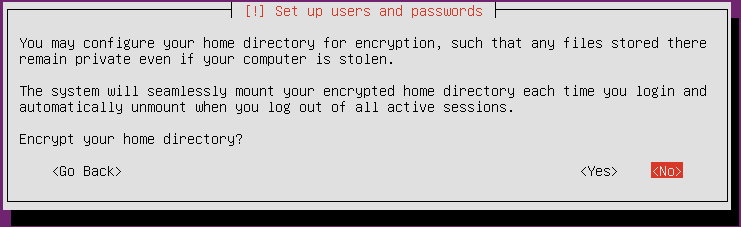
For my uses there's really no use to encrypt the home directory. The way this works is that when the suer is logged out, their home directory is encrypted. When they log in their home directory is un-encrypted. This has a few consequences:
- The user must be logged in to be able to use their home directory.
- There may be some performance reductions on login/logoff, especially if there's a lot of stuff in the home directory.
For my purposes being able to have access to the home directory even when the user is logged off is important so I chose not to encrypt my home directory. In all honesty I'm not entirely sold on the idea of having an encrypted home directory unless it is absolutely necessary.
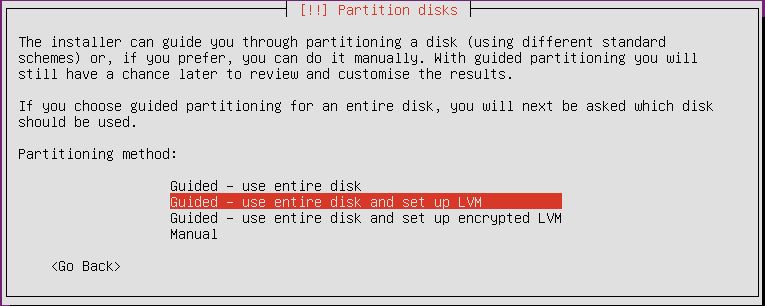
I decided to setup an LVM guided partitioning scheme. The LVM is the Logical Volume Manager used by Linux. It allows you to "hotswap" hard disks as well as has a bunch of other useful features. This way if in the future I decide I need more storage room I can just create a new virtual drive and hook it to my virtual machine. I'm using the guided mode to simplify the drive setup process.
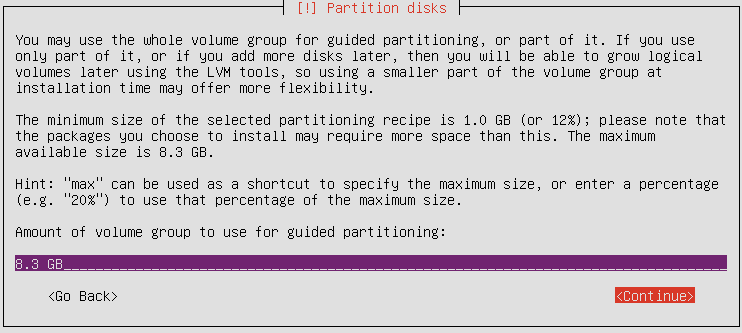
There's really no need for me to create multiple partitions on the drive, so I might as well allocate the full drive for a singel partition.
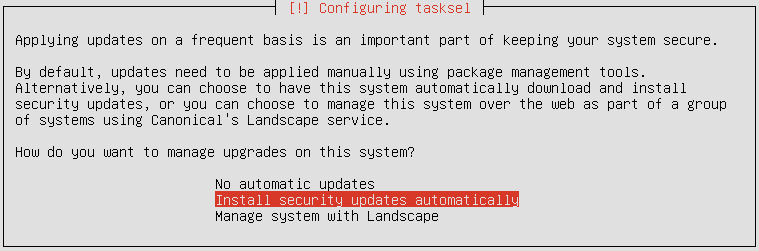
Depending on how you're managing your server(s) you may not want automatic updates. Really unless you have a reason to not use automatic updates I don't see why you should choose anything else.

The only two pieces of software I want now are OpenSSH and the SAMBA file server. OpenSSH allows you to use ssh to remotely login to the virtual machine. SAMBA is used so I can access the virtual machine file system from my host machine. I'm not positive if you need SAMBA if your host machine is a Unix variant such as Linux or Mac OSX.
Note: Use the space key to select/deselect items. Enter confirms your selection and moves onto the next step.
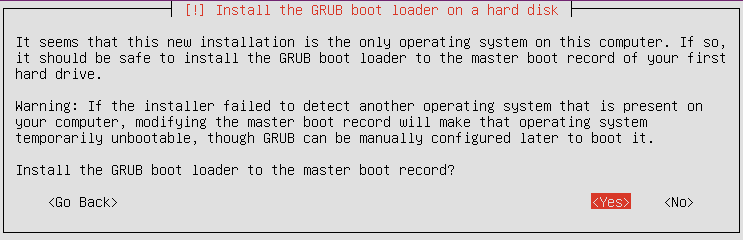
Since we only have one partition/system on our system we can safely install the GRUB bootloader to the master boot record.
Troubleshooting a FATAL boot error
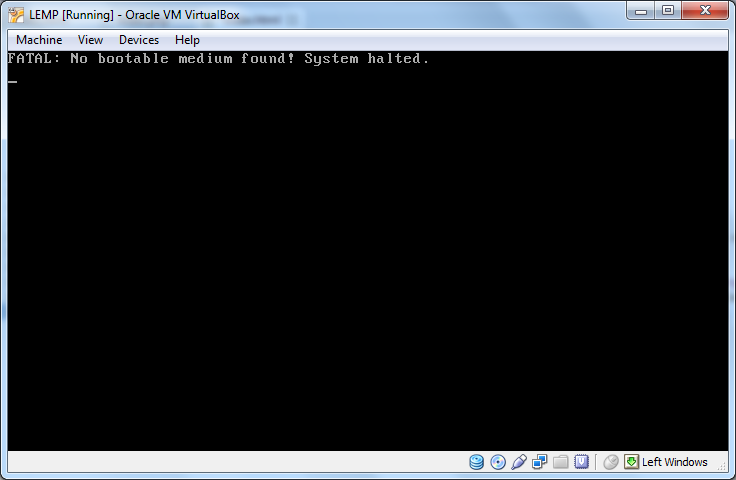
Things to check for:
-
Ensure you have the Ubuntu installation disk loaded in your Virtual Machine.
 Figure 10. How to check/change the available disks and images the Virtual machine is using.
 -
Ensure you have enabled CD/DVD-ROM booting in the virtual machine boot options.
 Figure 11. How to check/change boot devices and boot order. Ensure that CD/DVD-ROM and Hard Disk are enabled.
If you're still having issues starting up the Ubuntu installation, there are various ways to get further support. These include:
- Ask Ubuntu
- Ubuntu Community Support (forums, IRC, live chat, etc.)
- The main developers/maintainers of the Ubuntu Linux distro, Canonical, offer paid technical support.
Conclusion
Keep tuned for part 2 which goes through the details of setting up Ubuntu.
No comments :
Post a Comment